Dundee and
and Steve kayaked two hours in Robinson Preserve, Manatee County, Bradenton,
Florida. The Robinson
Preserve borders the mouth of the Manatee River directly across from Emerson
Point. This Preserve opens to Tampa Bay and Anna Maria Island.

Robinson Preserve is a 620 preserve with 40 acres of peaceful mangrove-lined waterways and mangrove water tunnel passages for canoeing and kayaking. It offers well-maintained put-ins and take-outs with restrooms, picnic shelters, kayak and canoe wash stations with hoses, and a 40-foot observation tower with a 360-degree view of the Preserve.
Directions
to Robinson Preserve
The Robinson Preserve borders the mouth of the Manatee River. The Preserve opens to Tampa Bay, Anna Maria Island, and the Sunshine Skyway Bridge, the 2nd longest bridge in Florida.
Our Route.
We see the observation tower after a ten-minute paddle from the kayak put-in. We land our kayaks and climb the tower for a fantastic 360-degree view of the region. In particular, we see Anna Maria Island, Tampa Bay, and the Sunshine Skyway Bridge.
We paddle across the lagoon from the tower put-in, looking for the mangrove trail under a footbridge. The trail bears left and right under the same footbridge, entering Tampa Bay. We then see clear Bay blue water and the four and a half mile Sunshine Skyway Bridge.
Enjoy the below 4-minute video of kayaking in Robinson Preserve.
------------------------------------------------------------
Below, our New Hampshire neighbors join us in putting together a 1008 Piece Puzzle graciously given to Cathy by Cousin Linwood. After four days of late-night effort, we (mostly Cathy and Dundee) completed the puzzle that celebrates the Knife Edge Trail hike. L-to R: Paul, Mike, Dundee, Tim, Shaun, and Steve as they celebrate their conquest of one of the most dangerous hikes in New England. We accomplished our goals:1. Hike to Baxter Peak, the northern terminus of the 2,162 mile Appalachian Trail (AT).
2. Cross the fabled 1.1 mile Knife Edge Trail.
3. Hike five miles on the AT starting at its northern beginning at Baxter Peak.
Our ultimate achievement through endurance and teamwork brought satisfaction because of the challenges and time on the mountain. Our Mt. Katahdin accomplishment was both physically demanding and mentally challenging. I am incredibility proud of my fellow adventurers and how we worked together for this team triumph.

" Everyone must do something. I believe I will go outdoors with family and friends"
---------------------------------------------------

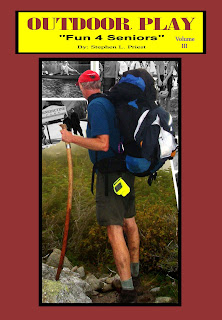
Outdoor Play has trip preparations, routes, and narratives of bucket list places to go. The book will motivate friends and family to make the outdoors a key component of their daily life. If you want 5 or more books signed, send Steve an email and we can work out the logistics.

Additional Sources of Books at:
Hardcopy at: http://outdoorsteve.com and https://www.amazon.com/dp/098503842X
E-book at: https://www.amazon.com/dp/098503842X
Steve’s books are available as hardcopy and e-Books at Amazon's Kindle and hardcopy at Harborside Trading Company, 81 Main St, Sunapee, NH, Wild Goose Country Store, 77 Main St, Sunapee, NH, Morgan Hill Bookstore, New London, NH, Bookstore at Colby-Sawyer College, New London, NH, Dartmouth-Hitchcock Gift Shop, Lebanon, NH, and Village Sports, New London, NH.

Outdoor Play has trip preparations, routes, and narratives of bucket list places to go. The book will motivate friends and family to make the outdoors a key component of their daily life. If you want 5 or more books signed, send Steve an email and we can work out the logistics.

Additional Sources of Books at:
Hardcopy at: http://outdoorsteve.com and https://www.amazon.com/dp/098503842X
E-book at: https://www.amazon.com/dp/098503842X