Saturday, September 24, 2011

Paddling the Waters of Quetico Provincial Park in Ontario, Canada

Quetico Provincial Park is a region of isolated Canadian wilderness straddling the Canada - United States border between southwestern Ontario and northern Minnesota. Quetico is composed of over 1 million acres of forests and thousands of miles of water routes. Permits are required for all visitors.

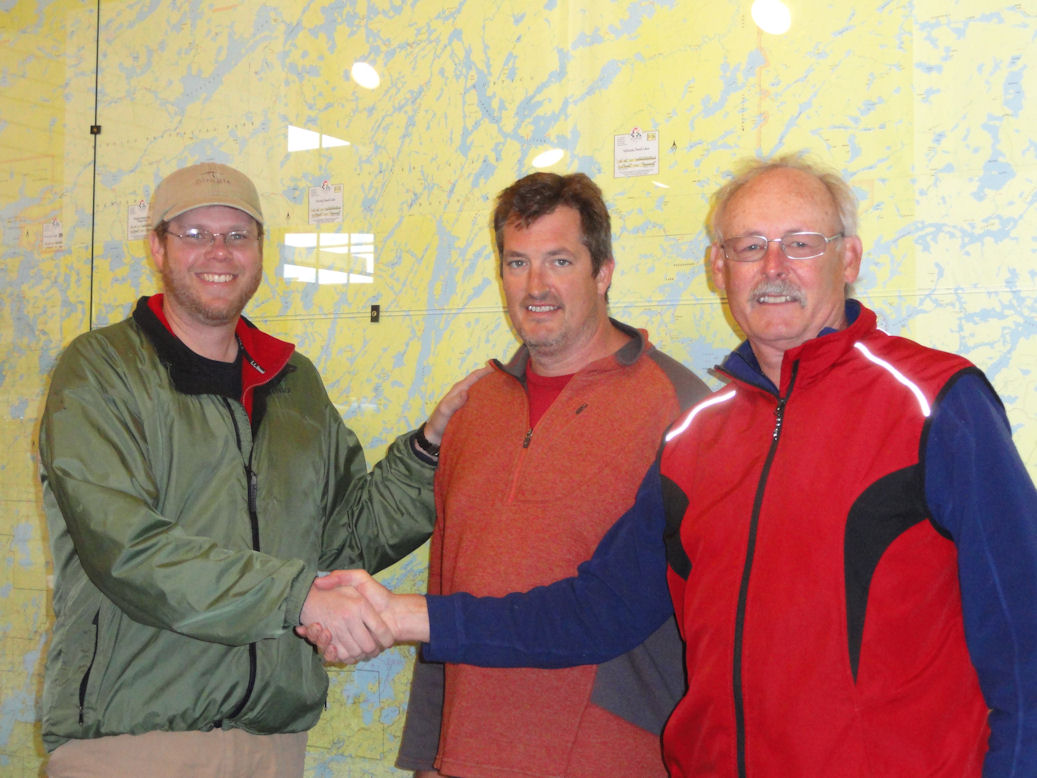
In mid-September three outdoor enthusiast friends and I paddled a six day 35 mile loop in the Quetico Provincial Park region of Ontario.

We all agreed we had the most physically and technically demanding portages we have ever attempted. We balanced these challenges against seeing some of the most beautiful wilderness, pristine water, and wildlife in the country.  Indeed, the boundary waters provided us with a very memorable and impressive paddling experience. 

The Portages
We had seventeen portages for eight plus portage miles. (Click here to see my spreadsheet for the lake sequences, their portages, and the portage distances).

My son Tim and I were in an 18' 6" 43 lbs kevlar ultra-light Wenona canoe, and Dundee and his son Paul in a similar model canoe. The portages were through dense woods with extremely narrow and rough granite rocks of all sizes and shapes, up and down hills, over fallen trees, mud, and water.

At each portage one person from each canoe carried the canoe on their shoulders using a leather padded neck yoke. I managed to portage the canoe 5 times, whereas Tim did the other 12 portages. Dundee and Paul likewise worked out a similar type of division of who carried the canoe at each portage. Our backpacks (in each canoe - a food pack and two packs for each of our personal gear) averaged 50 plus lbs for the first few days until we managed to finish the beer and get half-way through the food. (Authors Note: Next time we go – no beer. It is too heavy to carry!)

To get the full feel of our physical effort of the seventeen portages, you must realize the four of us had to each make three trips across the portage. Because of the narrow and rough terrain and its length, each canoe was carried by one person, while their canoe partner carried the food pack. We then returned over the portage for the remaining gear and carry our personal packs and other hand carried gear such as paddles, fishing poles, tent dry bag, and maps.

We had no injuries. Amen!

As you see from the portage spreadsheet, our first day of paddling had the three longest portages, and since it was our first day, we had the heaviest weight of our entire trip. I must confess - after we selected a campsite on the Meadows Lake island, set up our tents, and went for a much needed refreshing swim - we all took a one hour nap.  Exhaustion was upon us. Thereafter we began preparations for dinner.

Our Team
Paul, our Meal Planner and Chief Cook, did a fabulous job in providing wonderful meals. My son Tim shared with Paul the meal preparation, camp setups and cleanup, etc.

Dundee was the navigator with excellent map reading skills and keeping us on our water trail as we paddled through fifteen or so lakes. There were no trail signs or lake signs – our only guidance was the detail map and our compass showing the portages– and Dundee’s innate sense of direction and recognition of where we were in reference to the map.

As the days passed, we realized we were following a waterway highway as we portaged from lake to lake in a very logical manner.

On all five of our evenings we slept on islands - as we felt this would provide more security from bear and wolves. Two evenings we played “survivor man” and started our campfire with sparks from flint and steel.

Wildlife and Indian Pictographs
We saw a variety of wildlife, including eagles, loons, mink, beaver, otter, grouse, signs of moose, heard wolf calls, and had warnings of black bear from Quetico rangers, but no sightings.

We saw ancient Ojibwe Indian pictographs (paintings on the lakeside granite) and petroglyphs (images etched into the granite) along the lakeside cliffs. We had bought a book, Magic on the Rocks by Michael Furtman on the Pictographs of Quetico, and we read the book in camp to prepare ourselves with some education on these little understood Ojibwe artifacts (http://www.michaelfurtman.com/magic.htm).

Louisa Falls
We swam the first two days – day one off our island campsite in Meadows Lake and the second day in the middle of Louisa Falls - a one-hundred foot waterfall flowing from Louisa Lake into Agnes Lake. Halfway down the falls is a neat natural bathtub including a stream of water for a great back massage fromthe rushing water into the tub.

The following day we had a brief flurry of snow, and of course, swimming was over. We fished as we paddled, but caught nothing we could eat.

Forest Fire
There was a massive forest fire in the area - we could see and smell distance smoke from our island campsite on Summer Lake, but we were not in any danger.  The Quetico ranger at Prairie Portage told us they leave these most generally lightening started fires to burn out by themselves, as they are a natural process of the wilderness phenomena.

Rough Water and Cold Weather
We had three days of on and off heavy rain showers (including one shower of hailstones and snow) and 30 mph wind gusts and high waves as we crossed a few of the lakes. You ask, “Why did you cross in such rough conditions?” Well, we needed to seek a camp site for the night. These paddles absolutely required seasoned and strong paddlers, and thankfully we were all up to the task. There were no flips.

Amen.

The Water
The Boundary Waters and Quetico lakes are pure, clear and pristine water. Given the nature of the lakes being made by the movement of the glacier thousands of years ago, the water depth frequently dropped off close to shore as the lakes are within granite mountains.

A question we frequently asked before the trip was “where do we get our drinking water while in the Quetico waters? Certainly boiling or purification tablets are the wisest recommendation for drinking any lake water. However, as we spoke to those who regularly paddle these waters, the feedback was “as you paddle in deep water, push your empty water containers as far down into the water as you can reach and then open the cap. Replace the cap before you bring the filled bottler back up. This became our choice, and along with boiling this water for cooking and hot beverages, indeed we drank directly from bottles in which we stored our water.


Trip Preparation
We entered the Canadian waters at the Prairie Portage location into Quetico Provincial Park via a water taxi tow on Moose Lake from Ely, MN. To assure the entry date we wanted we needed to apply for an entry permit five months before our preferred date. There is a limited number of entry permits for each day. Piragis Northwoods Company in Ely coordinated our permit application, outfitted us with two We-no-nah canoes, maps, food backpacks, and a large Duluth type backpack that could handle what I had originally packed into three dry bags. No motored vehicles or power boats are allowed within the parameters of the Quetico wilderness area.

Our Paddling Route
Our six day water route was a loop of fifteen lakes within Quetico. From the Prairie Portage Ranger Station entry, we paddled north to Sunday Lake, then east to Meadows Lake, and then north on Agnes Lake until we reached the portage to Silence Lake. We looped back to Prairie Portage via the lake route known as the "S" chain of lakes: Silence, Sultry, Summer, Noon, Shade, West, South, and then to Basswood, Burke and Bayley Bay.

Although we passed through the northern Minnesota Boundary Waters Canoe Area (BWCA) as our canoes were towed with the motorboat, technically we did a Quetico paddling trip.

A Trip for the Physically Fit and a Planned Route
Our experience in the waters of Quetico shows: (1) You need to plan your portage route in agreement with the physical condition and paddling experience of your group. Develop your route considering portage length and portage frequency; (2) this trip is for the physically fit outdoor enthusiast; (3) you need strong and endurance paddling skills to handle long mileage with paddling amongst heavy wind and rough waves; (4) a strong back for heavy, lengthy, and rough portages; (5) have at least one member of your group with map and compass reading skills.  Remember Quetico has no trail signs or markers; (6) outdoor menu planning and cooking skills (at least one person); (7) an ability to set up a campsite, start a campfire in different weather conditions (at least one person) and (8) a team mentality with fellow trekkers in grinding and varying terrain and weather conditions, and camp setups, and (9) a sense of humor and enjoyment of the wonderful outdoors.

We all gained an appreciation for the beauty, tranquility and isolation of the Quetico area. Will we return, yes, absolutely.

Now, I never have to say, "I wish I had paddled the boundary waters of Minnesota and Canada."

Additional References
"Everyone must do something.  I believe I will go outdoors with family and friends"

Steve’s latest book, Outdoor Play "Fun 4 4 Seasons" is available as an e-Book at Kindle ($3.99) and hard copy at Amazon.com ($11.95)

Tuesday, August 2, 2011

Hiking Mount Chocorua - White Mountain National Forest

We rotate in the middle of Champney Falls with arms lifted knowing if this were springtime we would be engulfed within a roaring waterfall dropping hundreds of feet!  We see majestic Mt Washington with its Presidential brethren - over twenty-five miles away! Breathtakingly, Lake Chocorua is thousands of feet below from whence we had stopped hours before for pictures of where we now stand on Mt Chocorua.

For years I have viewed Mt Chocorua as I passed over the Kancamagus highway, drove south from Conway on Route 16, or viewed this magic mountain while watching dogsledding on Lake Chocorua. I asked, “What mountain is that?”, and in response to "Mt Chocorua," I say, “If opportunity presents I want to hike it".

Well, opportunity presents only when you make it happen. I asked my friend George if he wanted to hike Chocorua, he said “yes”, followed by Dundee’s immediate response of “Absolutely”.

Mt Chocorua Statistics and Trail Choice

While Mt Chocorua at 3,480 feet is not one of the prized  4,000-foot peakbagger mountains in New Hampshire, its rocky summit is readily visible from all directions. Viewed from the South at Chocorua Lake it appears as a rock pyramid, from the East it is more like a camel's hump, and from the North a shark's fin. (http://en.wikipedia.org/wiki/Mount_Chocorua).

Six major trails lead to the top of the mountain. We chose Champney Falls Trail.

Champney Falls Trail

Champney Falls Trail merges with Piper trail for the final ascent. The one-way hike is a distance of 3.8 miles and 2300 feet ascent from the Kancamagus Highway trailhead to the summit of Mt Chocorua. Our hike time for the ascent was three hours, whereas our descent was two and a half hours.

We follow a yellow paint stripe trail sign. Above tree line all trails join in a single jagged rock path requiring scrambling and extensive use of hands, planting of feet against boulders for more lift traction.  Being hesitant about heights, I resist the urge to look down the drop-off. Close to the top the yellow markers are faded and harder to see, and we often guess we are on the correct trail, and then again we spot the bleached and nearly recognized yellow strip. Whew.

The last hundred yards finds you surrounded above and below by massive granite rock.  You look up toward the seemingly far away Mt Chocorua summit, and second-guess yourself as to whether you can reach it.

Mount Chocorua Name History

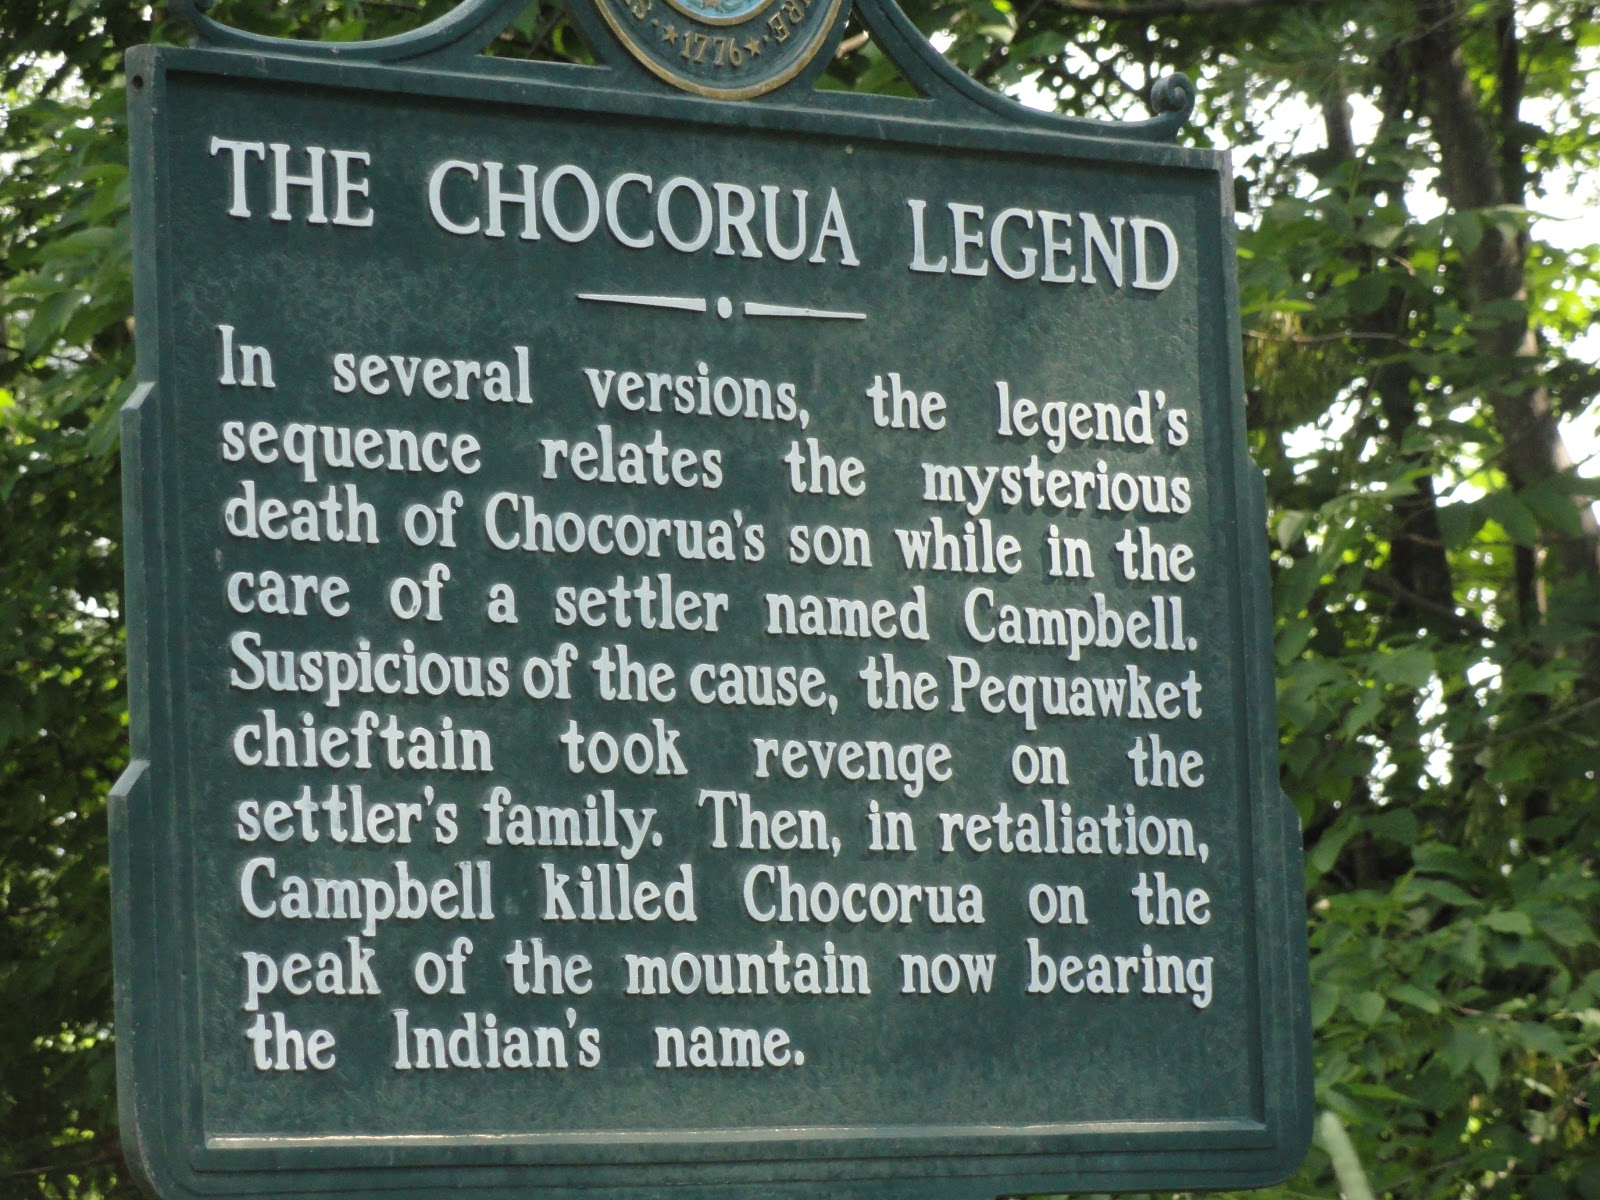
As noted on the Wikipedia web site, there are many versions of the Chocorua legend, one of which is displayed on a historical marker near Chocorua Lake.

Special Memories

• Standing in the middle of Champney Falls with its hundred plus foot drop

• Seeing a Mother Black bear and her cub run across our trail.

• The last few hundred feet climb of Chocorua is grabbing ledges, positioning my feet, and pushing myself up, then re-grabbing, positioning feet, and pushing again, etc.

• Standing on a cloudless seventy-degree day on the summit of Mt Chocorua with a 360-degree view that includes northern New Hampshire’s presidential range, lakes and peakbagger mountains.

Just a few more feet!


• This hike in wet weather would be extremely slippery and not recommended for the beginning hiker.

Now, George, Dundee and I never have to say, “We wish we had hiked Mt Chocorua!”


Steve's latest book, Outdoor Enthusiast: Never say, "I wish I had..." is now available as an e-book at Amazon's Kindle and Barnes and Noble's Nook.

To see all the pictures and videos of our Mt Chocorua hike, click here.

Sunday, June 12, 2011

Kayaking on Cape Cod at the Great Salt Marsh

Our friend John invited Dundee, my son Tim, and me for a day’s kayak paddle near John’s Cape Cod home. We expected an easy paddle in Barnstable Harbor’s protected waters.

Our 11 AM put-in at Scudder Lane’s paved ramp began an hour before low tide.  Due to winds of 10 to 15 mile per hour, mixed with the change to incoming tide, we experienced choppy water and one to two-foot waves -- and a somewhat exciting paddle.

We had light winds as we crossed the harbor to Sandy Neck and paddled along its beautiful sand beach.  We saw the power of the ocean on the great salt marsh as you will see in the below video of chunks of sand being pulled into the bay.

• We walked on Sandy Neck beach – and this required pulling our kayaks over low tide sand bars.

• We did not paddle the extreme marshes as low tide left only mud lanes. Our brief venture into the marsh required stepping ashore and going through foot-deep mud to get to the high water grass. My water sandals were nearly lost as the mud would only release my feet after I removed my sandals.

• When the tide changed, we experienced a tidal phenomena at spots where low water sand bars and deep water met. You will see in this brief video water frothing, similar to white water flowing over rocks – but rocks were not present. Indeed I was at first hesitant to cross this very real white line, but after passing through a few of these areas I realized the froth was only the outgoing and incoming water meeting on the low tide turn.

• We paddled by oyster farmers “up close and personal” as they cultiavated their oyster beds.

• Our water tour of Barnstable Harbor and its Great Salt Marsh lasted four and a half hours.


Getting there:

“Barnstable Harbor is located on Cape Cod Bay between the barrier beach of Sandy Neck and an extensive saltmarsh estuary between Sandwich and the Cape Cod Canal to the northeast and Wellfleet to the southeast. It's roughly nine nautical miles from the entrance of the Cape Cod Canal to Barnstable Harbor.

It’s important to note the tide and other conditions. If it's particularly nasty, you may want to pass on because of the Barnstable Harbor entrance's shallow water and east-west tidal currents that shift north to south in the harbor channel. A tidal range of nearly 10 feet makes the harbor prone to shoaling. It is best to enter the harbor on a rising tide. Once in the harbor channel, stay well within the markers, as the areas off Beach Point and Sandy Neck Light are very shallow and prone to strong currents.

Nearby Scudder Lane has a paved ramp that launches into the harbor, but it has limited parking. Finally, while boaters would be wise to avoid Barnstable Harbor's tricky network of creeks and marshland, kayakers and paddlers will love it. However, if embarking on an unguided trek, be sure to take along a GPS and/or a cell phone, as it's easy to become stranded or lost in the Great Marshes' maze of creeks. Use NOAA chart 13251.”

I never have to say, “I wish I had kayaked the Great Salt Marsh of Cape Cod”

Click here to see all the pictures and videos of Kayaking Barnstable's Great Salt Marsh.

Steve’s latest book, Outdoor Enthusiast: Never say, “I wish I had…” is now available as an e-Book at Kindle and Nook.

Read more at:

• http://www.trails.com/tcatalog_trail.aspx?trailid=CGN029-026

• http://www.greatmarshkayaktours.com/naturalists_dream_tour.htm

Friday, May 13, 2011

Hike from South Rim of Grand Canyon’s Bright Angel Trail Down to Indian Garden and Back to the Rim

Last week I had the privilege of being in Grand Canyon National Park in northern Arizona. Certainly as an outdoor enthusiast, I had to walk more than the Canyon’s Rim Trail.  My friend JK recommended a hike into the Canyon to Indian Garden via the Bright Angel Trail. The estimated hiking book time was 6 to 9 hours for this 9.2 mile hike down and back to the south rim.

My enthusiasm for hiking into the Canyon was cautioned by my fears of:

1. My fear of height. The south rim of the Grand Canyon is nearly 7,000 feet above sea level. The thought of looking over a drop-off of thousands of feet was admittedly something I was not sure I could face.

2. Meeting Mules on the Bright Angel Trail. There are frequent mule trips passing hikers on Bright Angel Trail. Could I squeeze close enough to the mountain side to let mule riders pass me on the Trail?

3. Width of the Bright Angel Trail. Would the Trail down into the Canyon be so narrow as to force me to hug the mountain?

On Thursday morning at 6:40 am I began my hike on the south rim at the Bright Angel Trailhead. Two and a half hours and 4.6 miles later I reached Indian Garden. The hike down was fabulous, and I stopped frequently in awe of this incredible landscape and to take pictures and “smell the roses” of my America’s beautiful country.

The four ½ hour return trip from Indian Garden to the rim was quite the challenge. The only thing that kept me going was I knew I had a six-pack sitting on ice in my cooler!

I believe the main reason for my exhaustion on the return trip from Indian Garden to the south rim was because I had not trained at 7,000 feet above sea level. My daily Bedford, New Hampshire training runs were at an elevation of 275 feet.

Lessons learned from my six plus hour hike from the south rim on Bright Angel trail to Indian Garden were:

• Height. My fears were for naught. The width of the trail was four to six feet, and most often the cliffside of the trail had trees and rocks that eliminated any fear of falling hundreds or thousands of feet

• The width of the trail was more than enough to accommodate mules passing. I had three groups of mule riders pass me on the way up. As they passed I simply sat on the mountain side with plenty of room to relax, drink water, and take pictures, as you will see in the video.

• The three rest areas (Mile-and-a-Half Resthouse, Three-Mile Resthouse, and Indian Garden) all had water sources for refills of my water bottles.

• The dust from the limestone was choking and blinding. Following another hiker up the trail put me in a dust cloud and I had wait until the hiker was way ahead before I continued my trek. The mules passing generated even more dust. Certainly a person with dust issues needs to be very aware of this situation.

• Shade was plentiful in my morning trek down. However, my journey back to the rim started around 10 am and shade was less prominent and the bright sun was hot resulting in sweat mixed with suntan lotion (a mandatory item) burning in my eyes.

• There were four-foot timbers every three to four feet on the trail to prevent trail wash away. This meant on the return to the rim I had to constantly lift my feet six to twelve inches with every step. My thighs began aching before I reached the Three-Mile Resthouse.
• My approach to the hike back was to divide my trek into three phases: (1) Hike from Indian Garden to the Three-Mile Resthouse, (2) Hike from the Three-Mile Resthouse to the One-and-a-Half-Mile Resthouse, and (3) Hike from the One-and-a-Half-Mile Resthouse to the Canyon’s rim.

Sign at Three-Mile Resthouse: Down is Optional – Up is Mandatory

Hmm, I trust the picture of Down is Optional, Up is Mandatory, caused you to ask yourself, “What does Down is Optional – Up is Mandatory mean?” Well, as noted, hiking down the Canyon is essentially an easy stroll. Your main concern is to lift your feet so not to trip over the log sections and rocks. Thus “Down is Optional” means go down the canyon knowing you must be able to climb back up – thus “Up is Mandatory” means you are responsible for getting yourself back up to the canyon rim. There are over 200 heat-related rescues in Grand Canyon National Park each year, and most of them on the Bright Angel Trail. So, a word to the wise.

The need to replenish water is a live saving concern in a desert country. Water replacement in May is no issue as my 4.6 miles descent of the Bright Angel Fault to Indian Garden had three springs. Only Indian Garden has water year-round.

The steep decent is made easy through switchbacks curling down the mountain. You will also be returning up the same trail – and that is where the rub lies. Because the climb is to the 7,000 above sea level rim, the dust from the path, the constant lifting of your legs and hurt of your thighs, minimal shade, and your level of cardio fitness, this can be a life-threatening and injury decision. So, “Up is Mandatory” means overcoming all these barriers that can prevent you from returning to the rim.

Memorable Moments

• As I hiked I began thinking this trail would be runnable, similar to my winter wild experience described here in an earlier blog post. Then, just before the One-and-a-Half-Mile Resthouse, I was passed by a person running. A few minutes later I met him at the Resthouse. We introduced ourselves, and he said he was 63 years and “out for an early morning run”. He turned around at this point and ran upward toward the rim.

• As I neared Indian Garden the Trail leveled off, and I would run a bit – both to reduce the time to Indian Garden as well as to change my gait and vary use of different leg muscles.

• On my return to the rim, I could see a woman walking very slowly in front of me. She was stumbling and stopped frequently to grasp the wall. She appeared to me to be in trouble. I caught up with her, and we spoke as we rested against the wall. I asked her if she needed any assistance, and she replied “No”. We both were near finishing, and I waited for her near the Bright Angel Trailhead. We did a high-five. Certainly she was close to not understanding, “Down is Optional – Up is Mandatory”

• Because of my early morning start, almost all my down hike was in the shade. However, my return hike was mostly in the sun - and it was very hot.

• Going down I did not touch the wall. On my trek back, I frequently would use the wall to support my upward momentum - and the wall was cool. I kept thinking a hiking stick would be nice about now.

Enjoy my video and hike into the Grand Canyon to Indian Garden and my return to the south rim.


I never have to say, “I wish I had hiked Bright Angel Trail into the Grand Canyon”

++++++++++++++++++
"Everyone must do something.  I believe I will go outdoors with family and friends"
Steve's 5th book, Outdoor Play Fun 4 4 Seasons Volume II, is now available (2016).  
    S
    Outdoor Play Volume II has trip preparations, routes, and narratives of bucket list places to go. The book will motivate friends and family to make the outdoors a key component of their daily life. If you want 5 or more books signed, send Steve an email and we can work out the logistics.

    Order books at:

    References to the Bright Angel Trail

    • http://en.wikipedia.org/wiki/Bright_Angel_Trail

    • http://www.bobspixels.com/kaibab.org/bc/gc_tr_ba.htm

    • America's 10 Most Dangerous Hikes - Bright Angel Trail, Grand Canyon, AZ http://www.backpacker.com/survival/bright-angel-trail-grand-canyon-america-s-most-dangerous-hikes

    Sunday, April 17, 2011

    Blue Steel Triathlon Club - Bicycle Indoor Time Trials

    What do New Hampshire outdoor enthusiasts do on a cold blustery day in March? We ride our bikes indoors! On Sunday March 27th in Milley’s Tavern alongside the roaring Merrimack River in Manchester, the Blue Steel Tri Club coordinated a 10K indoor course race using dynamic bicycle trainers that allows athletes to ride their own bike while pedaling a challenging course simulated with an interactive computer interface.

    Sound easy? Nope!  Riding your bike up steep hills mixed with going all-out on flat raceways, has you shifting constantly to maintain your cadence and watts.

    Fast Splits provided the Computrainers, computer software, hardware and peripherals (interface meters between the computer and the rider’s trainer).

    This was my first simulated bicycle time trail, and I did not know what to expect. Frankly, given the cold weather of our New Hampshire spring, I had only been outside riding twice along with one indoor spinning session three days before the race.

    Let’s enter the room where the race time trial takes place.  There is a computer control station centered in back of eight trainers. In front of the trainers is a 5x6 computer screen image (below) with the name of each of the eight riders, and race specific information for each rider to see their race position and effort: how far behind/ahead of the others; distance traveled; time into the race; speed; watts (calculated by rider/bike weight, velocity in mph, amongst other variables.) (http://bikecalculator.com/veloUS.html.)

    We had sixty-four men and women cyclists ranging in age to 70 years young.

    A race like this cannot exist with just athletes. Three behind the scene people made this event happen. Jeff Litchfield and Mike Bradford of Blue Steel Tri Club organized the event and worked throughout the day handling issues to make sure things went smoothly. Johnny from Blue Steel Cyclery, our Gold Sponsor, helped athletes set up their bikes, tweak air pressure, insert skewers, and other maintenance items as requested by the athletes.


    The selected interviews in the below video go beyond asking the traditional, “How did you feel while racing?” Instead I, as a fellow competitor, wanted to hear and learn - “What parameters from the race screen were important to you during the race?” Many of the responses are humorous as they show the competitiveness of friendly rivals.

    Want to see the results of the Bikes and Beers Time Trial?  To see all the day's videos and pictures click here.


    Steve’s latest book, Outdoor Enthusiast: Never say, “I wish I had…” is now available both in hard copy (http://www.outdoorsteve.com/) and in e-Book (Kindle and Nook).

    Tuesday, March 29, 2011

    A Volunteer for Running Shoe Development

    I received an email from Pedro Rodrigues, a Sports Research Engineer in the New Balance Sports Research Laboratory.  New Balance was launching a new research study looking at the effects of running shoes on lower extremity mechanics.  Pedro asked if I would be interested in serving as a tester.

    Absolutely! I have been a committed runner for 25 plus years, have experienced a variety of leg and foot injuries, and have run in numerous brands of running shoes to “improve my speed” and avoid injury.  In fact, I was currently running in New Balance shoes, and my contribution to this study might provide valuable data and help develop new running shoes and technologies. Besides, I could not pass up a chance to take part in a running shoe study by an athletic shoe manufacturer making their shoes in the USA.

    I drove to the research lab in Lawrence, MA, and signed confidentiality and injury release forms. Pedro explained the goal of the study was to evaluate how a single component of the running shoe affected the mechanics of my leg.  Therefore, each shoe was essentially identical other than that single factor, allowing the researchers to understand the specific effects of that one factor.  I then ran on a treadmill in ten different pairs of shoes.

    Pedro measured my leg and ankle and then place reflective markers in specific anatomic locations.  These reflective markers were then tracked using a motion capture system (Qualisys, Gothenburg, Sweden) as I ran on the treadmill at a constant speed.  This system consisted of 8 cameras, which sent out infrared light that reflected off these markers.  Next, by combining the view of each camera, the motion of my leg could be reconstructed in 3-D (see video), allowing the engineers to calculate joint angles, velocities, etc.  In this particular case they were interested in the position of my ankle when I first struck the ground, the amount I pronated (foot rolling to the inside), the speed I pronate, etc.  They will collect this information on a number of runners and will run statistical analyses to see if the controlled factor had any effect on a runner’s lower body mechanics.

    Share with me the excitement of running research. New Balance offered me an opportunity related to my dedication to running. Running is a major part of my lifestyle and I firmly believe running allows me the cardiac endurance and fitness to maintain my outdoor pursuits. Click on the video showing the body marking and reflectors, running on the treadmill, and the 3-D results.

    Now, I never have to say, "I wish I had contributed to a New Balance running shoe study. "


    Steve’s latest books, Outdoor Enthusiast: Never say, “I wish I had…” are available both in hard copy (www.outdoorsteve.com/) and in e-Book (Kindle and Nook).

    Click this link to SUBSCRIBE to OutdoorSteve's YouTube Channel


    "Everyone should believe in something. I believe I’ll go Outdoors.” 

    Steve’s books are available as hardcopy and e-Books at Amazon's Kindle and hardcopy at Harborside Trading Company, 81 Main St, Sunapee, NH, Wild Goose Country Store, 77 Main St, Sunapee, NH, Morgan Hill Bookstore, New London, NH, Bookstore at Colby-Sawyer College, New London, NH, Dartmouth-Hitchcock Gift Shop, Lebanon, NH, and Village Sports, New London, NH.


    For more of Steve’s outdoor guidebooks and documentary videos, visit OutdoorSteve.com and Outdooradventurers.blogspot.com.


    Sunday, March 20, 2011

    Outdoor Enthusiast Now Available in E-book format!

    For $3.99 you can download Outdoor Enthusiast: Never say, “I wish I had…” from Kindle.com and Nook.com onto your portable e-book reader.


    In addition to Amazon’s Kindle (ASIN B004S7EZLQ) and Barnes and Noble's Nook (ISBN 9780615225050), the Outdoor Enthusiast e-book can be downloaded to various e-book readers and smart cell phones:


    • Kindle for Mac
    • Kindle for PC
    • Kindle for iPad/iPhone
    • Kindle for BlackBerry
    • Kindle for Android
    • Kindle for Windows Phone
    • Nook for Android
    • Nook for iPad/iPhone
    • Nook for iPod Touch
    • Nook for Blackberry
    • Nook for PC
    • Nook for Mac

    If you notice content issues when reading the book, please send me an email at steve@outdoorsteve.com.  When I update Outdoor Enthusiast, I will notify you to re-load the book.

    Saturday, March 5, 2011

    Winter Wild at Mt Sunapee New Hampshire

    Winter in New Hampshire offers exciting opportunities for outdoor enthusiasts. This unique ski area race is called “Winter Wild“ (http://www.winterwild.com/) and was held March 5th at Mt Sunapee Ski Mountain, Newbury, NH (http://www.mountsunapee.com/).

    The rules for this four mile snow-covered uphill/downhill race at Mt Sunapee were pretty easy and simple. You cannot leave anything stashed anywhere on the mountain! Whatever you go up with you must return with at the bottom the hill.

    The 133 athletes wore a mixture of ski and running equipment. Some donned their alpine skies up the hill, while others backpacked them up. Others wore back country skis or Telemark skis, and either wore them climbing up the hill or backpacked them. Many skiers used climbing "skins" on the bottom of their skis for traction uphill on the icy and snowy slopes. Quite a few wore crampons with hiking boots or running shoes.

    My choice was my hiking boots with running crampons.

    The Mt Sunapee course is marked on the map in red and follows the clockwise peripheral of the ski area. The course begins at Spruce Lodge and then up Elliot Slope to the access road down where you ascend the Williamson Trail to Stovepipe and up to the Mount Sunapee summit. You descend the Upper Ridge to the Lower Ridge trail returning to the lodge.


    Some Winter Wild moments:
    • We had a 6:30 am start because to have all the participants off the mountain by the time the Mountain opens at 8 am.
    • Half way through the two-mile uphill I felt a cramp coming in my right calf. I slowed to a walk for a few minutes and then continued my run and walk pace.
    • As we ascended the 2,726 feet mountain with its three secondary peaks it was foggy and at the peak we had snow. The temperature at the top was in the mid-twenties.

    Enjoy my video as you join me in this unique winter event. I never have to say, "I wish I had run the Mt Sunapee Winter Wild race".

    My February 27, 2011 post documents my training and equipment/clothing research for this race.

    Sunday, February 27, 2011

    Winter Wild in New Hampshire

    Winter in New Hampshire offers unique and exciting opportunities for outdoor enthusiasts. In this month’s blog I share my training and research in preparation for running a race up the ski slopes of Mt Sunapee in the middle of the winter. The race is called “Winter Wild“ (http://www.winterwild.com/) and is held March 5th at Mt Sunapee Ski Mountain, Newbury, NH (http://www.mountsunapee.com/).

    The rules for this race are pretty easy and simple. Whatever you carry up the hill is what you descend the hill with. Acceptable devices area downhill skis, XC Skis, Telemark Skis, snowboards, snowshoes, crampons or just plain running shoes. You cannot leave anything stashed anywhere on the mountain! Whatever you go up with you must return with at the bottom the hill.

    The first video describes my winter run at Pats Peak (http://www.patspeak.com/). The second video is my practice run at the Mt Sunapee course.

    Both courses are marked on the video’s maps in red and follow the peripheral of their ski areas. The courses starts at the bottom of the mountain at the ski lodges, and finish on steep downhills that rush you back to the lodge. The Pats Peak course is counter clockwise, and the Mt Sunapee course is clockwise.

    The Mt Sunapee course starts up Elliot Slope to the access road down where you start ascending the Williamson Trail to Stovepipe and up to the Mount Sunapee summit. You descend the Upper Ridge all the way down to the Lower Ridge and finish in front of the Spruce Lodge.

    The learning experience:
    Since this would be my first time doing this type of winter event, my practice runs would help me decide:
    • Was I in good enough physical shape to do my first ever uphill and downhill ski run?
    • Do I wear running shoes or hiking boots? Or, do I could carry my back country skis up the hill, and ski down. Another possibility was to carry my snowshoes uphill and use them downhill.
    • Do I wear crampons? I had never run in crampons before so I was concerned about their feel.
    • What clothing should I wear for a run up a mountain in the middle of a New Hampshire winter?
    • After the Pats Peak run I experienced a sore right calf. My remedy was to use a wooden dowel to massage my calf throughout the day. Three days later I ran five miles with not a wimp of pain.
    • Half way through the two mile downhill Mt Sunapee run I felt an ache in both quads. I slowed to a walk for a few minutes and then picked up my run. That evening and the following day I used my wooden dowel to massage both quads.
    • The Sunapee run produced a blister on my left foot middle toe. I suspect the uphill trek in my hiking boots caused this. A band aid for two days cured the blister.
    • I drank lots of water to ward off possible cramps. Must have worked, as I experienced no cramps.
    • My running base of twenty to twenty five miles a week running has me at a good cardiac level for this unique winter ski mountain run. The lesson here is before you do a ski mountain race, be sure to develop a good cardiac level.
    Enjoy my pictures and video as you join me in answering my questions for this unique winter event, so that I never have to say, "I wish I had ran the Mt Sunapee Winter Wild race".


    Wednesday, February 2, 2011

    Enjoy a Winter Experience in New Hampshire.

    This winter Cathy and I have been fortunate to XC ski both in Bedford, New Hampshire and in Dixville Notch, New Hampshire. We also interviewed sleigh ride owners Dennis and Tina Willey (hitchhorses.com). The same day we entertained guests of the majestic Balsams Grand Resort (thebalsams.com) with our north woods treks previously posted on this blog.

    Attending our Enjoying the Great North Woods presentation were the two Inn—Bedded Resorters of the Balsams, Alexandra and Luke (alexandluke.com), Canadian social media travel superstars. The team of Alex and Luke has spent the past year crisscrossing North America, sharing their traveling adventures through social media tools like facebook, Twitter, and more. As guests of the Balsams, the pair tries all of the fine dining and outdoor adventures The BALSAMS has to offer, and then share them with the world using social media.

    Click the below videos and Never say, “I wish I had enjoyed a winter experience in New Hampshire”.